Top
HOME   BOOKS

How to take better pictures with any camera.
Page 1
Photo Tips, by John Bower

These tips will help you compose a better image while looking through the viewfinder. There are no complicated technical issues, so if you're a beginner, please don't be frightened off. Most of these Tips are not new. I learned them from other people, and from reading photography books. But they were new to me when I first learned them, so they may be new to you as well. I like to shoot in black-and-white, so my examples tend to be black-and-white, but these tips apply to color as well.

Additional Photo Tips

[Page 1] [Page 2]

Photo Tip #1 CHANGE YOUR PERSPECTIVE.

Most photographs are taken by a person who’s standing up and holding their camera at eye level. For something a bit different, take a picture of your subject while you are laying down on the ground or floor, and point the camera up. Or shoot your subject while pointing the camera down, from a balcony, the top of a swing set, while standing on a chair, or even from up in a tree. This will not only give you a different viewpoint, it will also change the background. For example, a straight-on shot may have a house behind it, while a looking-up shot will have a simpler sky background. And a looking-down shot in a park could have a background of all grass (or dandelions). Also, instead of shooting someone or something straight on, consider moving off to the side for a different angle. I sometimes shoot cemetery statues while laying down on the ground so I can have some nice sky and clouds for a background rather than a cluttered-looking bunch of tombstones.

item4a

Cemetery Statue, Jasper Co.378.07, from Guardians of the Soul

item5a

Studebaker Plant, St. Joseph Co. 682.14, from Journey's End

Photo Tip #2 WHEN IN DOUBT, GET CLOSER.

A famous news photographer by the name of Robert Capa once said “If your pictures aren’t good enough, you aren’t close enough.” So, if you’re going to take a picture of a person, and your first instinct is to shoot their entire body, head-to-toe, try moving in closer to them and just get a head and shoulder shot. Or, move even closer still, and crop off their forehead and/or chin. It can often make an interesting image. (Once you start noticing it, you’ll see this done on TV all the time.) The same concept can work for objects. If you’re shooting a classic car, don’t forget to move in close for some detail shots. If you can't get closer physically, try using a telephoto lens, if you have one. By the way, Robert Capa practiced what he preached, and it got him killed in 1954 in the very early days of the war in Vietnam.

item4

Cemetery Statue, Gibson Co. 383.11, from Guardians of the Soul

item5

Fire Engine, Greene Co. 958.13, from Journey's End

Photo Tip #3 VARY YOUR DISTANCE FROM THE SUBJECT.

The way I look at it, if something (or someone) is worth shooting, you may as well get more than one shot. And you should get them at different distances. Try getting a long shot (LS) where you see an entire scene, and a medium shot (MS) that’s somewhat closer, a close up (CU) where there’s no background, and an extreme close up (XCU) where you crop some of the subject away. You’ll be surprised at how different the shots look, even though they are of the same basic subject. And, I’ll bet one will stand out more than the others. If you do this regularly, after a while you may be able to picture, in your mind, the best distance for a particular scene, or the best 2 distances.

item8

House, Jackson Co. 186.11, from Lingering Spirit

item6

House, Jackson Co. 186.08, from
Lingering Spirit

Photo Tip #4 SHOOT LOTS OF PICTURES.

“You learn to see by practice. It’s just like playing tennis, you get better the more you play. The more you look around at things, the more you see. The more you photograph, the more you realize what can be photographed and what can’t be photographed. You just have to keep doing it.” That quote is by a photographer by the name of Eliot Porter (1901-1990). In this regard, becoming a good photographer is like becoming a good basketball player. You get better by practicing picture-taking or by practicing shooting

baskets. The more you do it, the better you get. Don’t say, “I’m no good at photography,” and then quit trying. Keep at it, and you will get better. One of the big advantages of digital cameras it that you can shoot a lot of pictures, then simply delete the bad ones. It won’t take you long before you’re deleting fewer and fewer of them. When I first started shooting, I felt lucky to get one keeper per roll of film, now I may only get a few per roll I’m disappointed in.

Photo Tip #5 MINIMIZE THE NUMBER OF COLORS.

Some scenes (like the Mardi Gras) need to scream with color, and they need all that color to convey a lot of energy. But other scenes and subjects can look better with less color. Sometimes, when there are too many different colors, the main point of the shot can get lost. If you are shooting a person wearing brightly colored clothes, they will stand out more if you position them against a background that is a single color. If they have a multi-colored outfit, and you shoot them against a multi-colored background, they can get lost in the clutter. Pictures with one or two colors or muted colors, can often be quite striking. For me, personally, I minimize all the way, and only shoot black-and-white. I think it often has far more energy than a color image. Of course, there are many really great color pictures out there, but you might want to try some black-and-white. You may like it!

img107

Flamingo, Indianapolis Zoo.
by Lynn Bower

img109

Building detail, University of Chicago.

Photo Tip #6 PHOTOGRAPH WHAT YOU KNOW.

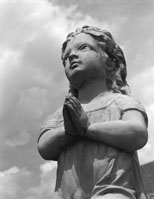
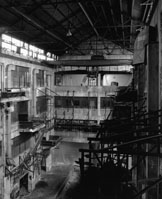
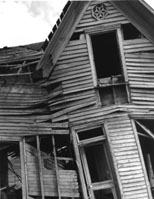
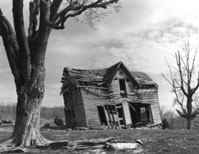
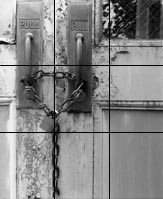
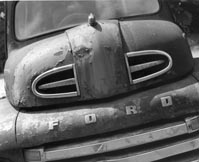
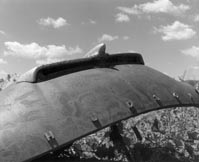
There are lots of people who only take pictures while on vacation. That’s great but, for some reason, they don’t think their everyday surroundings are worth shooting. Well, they are! A French photographer, Eugene Atget (1857-1927), spent a huge amount of time taking pictures of Paris, its buildings, people, architectural details, fountains, statues, interiors, and on and on. He found an amazing number of great subjects right in his own backyard and, today, they are a unique archive of the city of Paris from his era. Once you start looking around your own hometown, or country neighborhood, you’ll also see some amazing shots just waiting to be captured. I particularly like to shoot interesting signs and building details. And, because things are always changing, you will probably be capturing images of places that won’t be there tomorrow. I didn’t take many pictures as a kid, but I wish I had. I certainly have memories of the drug store where I used to buy comics, the old movie theater, the root-beer stand, the house in the country where we lived, but I have no photographs to accompany those memories.
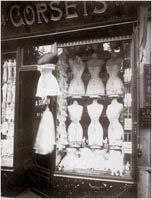
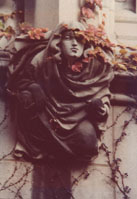
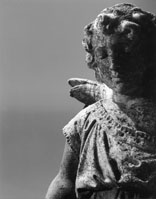
Atget1

Corset Shop, Paris.
by Eugene Atget

item9a

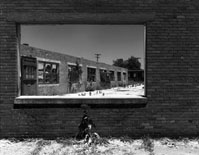
Frigid Whip sign (now gone), Perry Co. 486.12, from 2nd Stories.

Photo Tip #7 THE RULE OF THIRDS.

This is an easy way to position your subject in the viewfinder that will give a pleasing balance to your image. First, imagine two vertical lines dividing your viewfinder into thirds, and two horizontal lines also dividing your viewfinder into thirds. Those 4 lines will break up the rectangle of the viewfinder into 9 smaller rectangles of 3 rows and 3 columns. (I know people who have taken thin pieces of tape and stuck them to their digital camera’s LCD screen, so they don’t have to imagine the lines.) Now, when you look at a scene, position one (or more) important element of the scene on one of those lines, or on the intersections of those lines. For example, if you are shooting a close-up of a person’s face, compose the image so each of their eyes is at an intersection of the lines. If you are shooting a landscape, align the horizon on one of the horizontal lines. This concept can work for all sorts of subjects. You can place any important element (or several elements) in your image—a tree, person, steeple, anything—on the lines or at intersections, and it will often improve the balance of your image. And, don’t worry if it isn’t exactly aligned with the lines or intersections.

item9b

Tree with distant barn, Monroe Co. 079.03, from Lingering Spirit.

item10a

Boston Grade School/High School, Wayne Co. 952.06, from The Common Good.

Photo Tip #8 SIMPLIFY.

Photographs can sometimes be too busy, so try making them simpler, with not as much going on. For example, a shot of an historic building with a big crowd of tourists in front, or a shot of your friend with a lot of traffic in the background, can be too busy and confusing. By waiting for the crowd or the traffic to thin, you can often simplify, and improve, your image. You can also simplify by shooting a subject like a building from a different angle to eliminate a distracting element. Or if you are shooting a person, have them move in front of a background that’s less busy, or position them so a pleasing sky with fluffy clouds is behind them. You might crop away anything that’s extraneous. For example, if you want to capture a group shot of several people, try bunching them together and just shoot their faces, rather than including all their bodies. It’ll be a simpler shot, and their faces are what’s important anyway. I’ve shot old vehicles in junkyards on several occasions, and often find that the best images show a single car with minimal background, while several cars yields a cluttered image. Other times, if I use a plain and simple background to surround a subject, it’ll enhance the subject.

item9

Hudson automobile, somewhere in Indiana. 837.12, from Journey's End.

item10

Interurban Substation #6 (Indianapolis, Columbus & Southern Traction Co.), Bartholomew Co. 825.14, from Journey's End.

Photo Tip #9 TILT YOUR CAMERA.

This is something that can drive a newspaper editor crazy. That’s because newspapers tend to want pictures with a horizon that’s level and buildings that are vertical. But if you tilt your camera at an angle, your image will have a completely different feel. I’ve shot smokestacks, tall cemetery statues, and water towers with the camera tilted a bit and it often improves the image. Shots of people can benefit as well. If you’re after a close-up of someone’s face, try tilting your camera so their face isn’t square in the view finder. Experiment with this a bit and see if you like a little bit of tilt or a lot. Tilting isn’t something you’ll want to do with every shot, but it can certainly enhance some of your images and lend a bit of variety to your pictures.

item11

Fairview Cemetery, Floyd Co. 328.01, from Guardians of the Soul

item12

Ford Truck, Morgan Co. 831.07, from Journey's End.

Photo Tip #10 BE PREPARED.

While this generally means you should make sure your camera’s battery is charged, and you have plenty of memory (or in my case, film), it also means to take your camera with you. Think about how many good shots you’ve missed because you left your camera at home. I keep my camera bag on a hook next to the door, and I rarely leave home without putting it in the car. If you just get in the habit of taking it whenever you leave home, you’ll be surprised at how many more pictures you’ll be taking. This is much easier to do with the small point-and-shoot digital cameras because you can

keep one in your purse. But “Be Prepared” also means that you should know how to operate your camera without having to think about it. So, read the manual, and practice how to use the zoom, the flash, the macro setting. If these things are second nature, you’ll be less likely to miss a shot while you’re trying to remember how to change a setting. You need to be able to operate your camera automatically, with your subconscious mind knowing what to do. That way, you can concentrate on framing the perfect image in the viewfinder, and not have to worry if a setting is correct.

Photo Tip #11 DON’T SHOW EVERYTHING.

There’s an old Vaudeville expression that says “Leave them always wanting more.” Well, that can also apply to photography, and I use it regularly when shooting buildings and objects. You’ve probably seen many of what I call standard classified-ad pictures. They are pictures of houses and automobiles that show the whole house or car in a dull, uninviting manner. Well, that may be ok for a real-estate ad or when you’re trying to sell something on eBay, but if you want a photograph that’s more interesting, try capturing only part of the subject. If it’s a house, frame it in your viewfinder it so you only see 1/3 or 2/3 of the house, and make it the most interesting part. If it’s an automobile shoot just the front or the rear portion. When you are shooting an extreme close up of a person’s face, this is what you are doing, showing only part of the subject. I shoot everything from abandoned houses to cemetery statuary this way, although I don’t do it all the time. But sometimes it just seems like part of the subject needs to be cropped away. As architect Mies Van Der Rohe said, “less is more.”

item14

South Liberty Cemetery, Orange Co. 337.12, from Guardians of the Soul

item13

Hudson automobile, Somewhere in Indiana. 838.11, from Journey's End.

Photo Tip #12 FIND A FRAME WITHIN THE FRAME.

If you think about it, a photograph has 4 sides, so that’s its frame. It doesn’t matter if it’s going in an album, on a Christmas card, on your Facebook page, or hanging on a wall, those 4 sides will frame your image. Finding a secondary frame within those 4 sides, when you’re looking through the viewfinder, can give an image an internal frame that’s often quite interesting. An example: If you shoot through a doorway or window, and you can see the door frame or the window frame in the viewfinder, you’ll have a frame (the door or window) within a frame (the edges of the photograph). But you don’t need to have your inner frame visible on all four sides. So, if you shoot a child sitting on a swing, the swing’s seat and the support chains will form 3 sides of an inner frame. And the frame doesn’t even need to be square, as when you shoot a child sitting on the cross bar of the triangular end support of that same swing set, they will be framed within the triangle. And the frame can even be something living. Wedding photographers like to position the couple so they are framed by an arbor of flowers. A tree branch draping around two sides of your subject can also make an interesting frame. Or a car window framing the driver, or a dressing-table mirror framing your mother. Finding a frame within a frame is often easy to do, and it can really improve an image.

item15

Oak Hill Cemetery, Vanderburgh Co. 362.02, from Guardians of the Soul

item16

Keller Furniture Co., Floyd Co. 728.04, from Silent Workplace.

Additional Photo Tips

[Page 1] [Page 2]